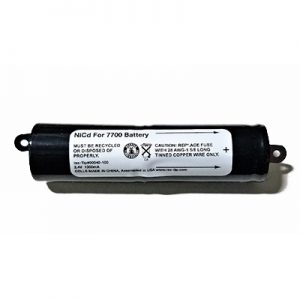
After Robert came to us with some great improvement ideas for Iso-Tip rechargeable soldering irons, we just had to share. We’re especially thrilled with his maintenance of the contact points, and you can bet we are looking into his other ideas as well.
Check out Iso-Tip’s cordless soldering irons here!
Here’s his letter:
“I have used Wahl (Editor’s note: Wahl = Iso-Tip) Cordless Soldering irons for many years. But the one issue I notice is the push button to press the contacts together to make a connection to the batteries. It seems that there is no positive contact for that connection. In taking the unit apart, there is a plastic button that pushes the contacts together. In making a connection to supply a large amount of current to heat up the tip, I think a knife blade type of connection would work better. I know space is limited, but it could be done.
I am a long-time Solidworks user and thought I might be able to model the connection redesign. Even if the iron was a little higher in height as it lays on a flat surface there would be more room for the improved switch contact. I am presently using a Model 7700 which I have altered slightly. I’ve had it for two years and the batteries are still taking a charge. You do have a good product if only there was a better way of making a connection. I noticed that the contact points get corroded/pitted. I cleaned these with a small flat file. The issue you are dealing with is supplying probably more than two amps to heat up the tip and how to make the best connection in a positive way, but the push button is not the best way. Let me know your thoughts on this. Thank you.
– Robert”
We agree with Robert on his assessment of the current contact arrangement. But before making any significant redesigns we want to give ourselves a few years of really managing the product line and getting to know how we can best improve it. In the mean time, we’d love to learn of any and all improvements you’d make to the line. Now, without further ado, it’s time to find the contact points.
- Open up your Iso-Tip rechargeable soldering iron by unscrewing the casing so that you’re looking at the guts of the soldering iron.
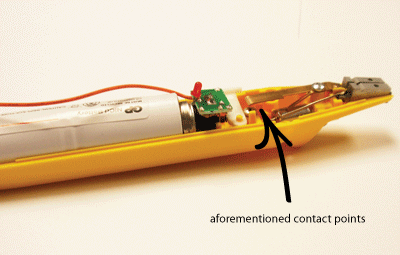
- Locate the contact points. (See images below.)
- File away any corrosion to keep the connection clean and your iron working like new.
i
It’s always the little things that make a difference, isn’t it? Thanks so much for sharing your insight Robert! What do you guys think? Have improvement ideas for the Iso-Tip line? What do you do to maintain your soldering iron?
For more helpful info on Iso-Tip, click here.


I’ve noticed the same thing. If the resistance in the switch is slightly elevated from poor contact, it can cause the switch (screw + copper strip) to heat up a bit, and the tip will not heat as well as it should. If the resistance in the switch gets really high, the unit just won’t heat at all, like a discharged battery.
The real problem here is the switch is made up of a domed Phillips-head screw and the flat narrow edge of a copper strip. Where those two shapes meet, it creates what is essentially a tiny, single-point contact. Combined with the current flowing through this contact, every time the switch is pressed, a tiny corrosive arc is made, causing the switch resistance to gradually increase with every use. Cleaning both sides of the contacts will fix it for a bit, but the real remedy is to file the screw head and/or bend the copper strip so the contact area becomes larger. It will still need cleaned occasionally, but much less often, and will more reliably deliver the full power to the tip.