 Troubleshooting Your Model 7700 Cordless Soldering Iron
Our Model 7700 Cordless soldering iron is known for lasting a long time, but after enough years of use they might need some maintenance. Luckily, our irons are easy to service and troubleshooting an Iron doesn’t take much time! This guide will give you some ideas on what might be the issue with your iron. If your iron is out of warranty and you would rather have us diagnose and rebuild the iron you can find the 7700 rebuild program here.
Testing your unit for power
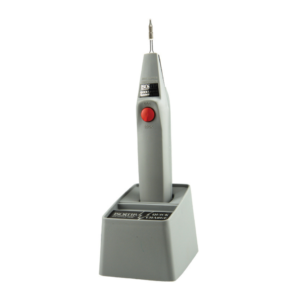
The charging stand pins should stick out approx. 1/8″ from the bottom of the base of the plastic pocket they are in. Use a multi meter set for DC voltage and check the read out those pins. They should read around 1.6 to 1.8V. If they don’t read that then the base is bad. It could be the transformer or the wiring connections. The transformer can be checked with an ohm meter – if either set of shows an open circuit the transformer is bad. See more on replacing the transformer below. If the base is good, test the iron.
Please note opening the unit is only for trained professionals and it does void the warranty. If there are issues here with the internal wiring, we recommend returning the unit for repair. If you would still prefer to do the repair yourself you can open it up and check the internal connections. If the light doesn’t come on then it could be the lamp, the button assembly, the wiring inside the iron, or the connection between the iron and the base. The lamp can be removed and tested with a ohm meter and should read a couple ohms. (You can also test it on a battery – 1.5V is enough. sometimes I use a 9v but only quickly as that’s too much for the light). We can replace the battery and test the wiring inside as needed.
Place the iron in the stand and press the button. If the light does light up while in the stand, we know the connections are good and the charge stand is providing power to everything. At this point it’s most likely the battery – though it could be an issue with the wiring to the tip.
Battery
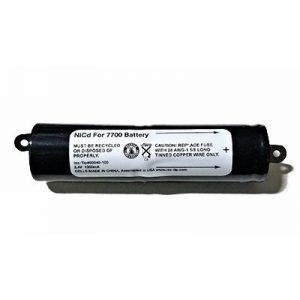
The most common cause of problems is the battery. After around 10 years of use, the battery can get too corroded to work properly. Eventually, it will stop taking a charge altogether. To check this, simply open your iron up and see if you notice any corrosion on the battery. If you do, it’s probably time for a new one. Fortunately, this is an easy problem to solve. All you will need is a replacement battery to get your iron up and running again.
For instructions on how to replace the 7700 battery for your soldering iron, click here.
 Transformer
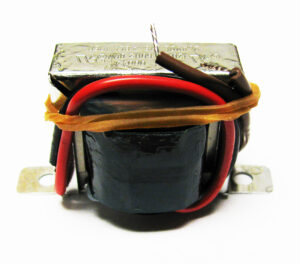
This is a less common problem, but we have seen cases where a transformer goes bad. If you have a voltage tester, see what the output of the charger is. It should be around 1.7VDC. If it’s low or nonexistent, then you’ll need a new transformer. Like the battery, the transformer is also easy to replace. You can find them here.
Tips
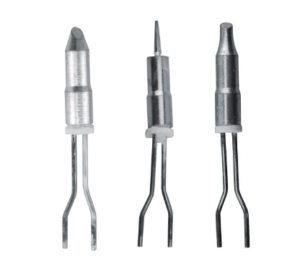
Once a tip has too much build up you will notice they don’t heat up like they used to. Before going too deep into iron repair we recommend swapping the tip and making sure both sides are properly in place. If you have ordered a new tip and the iron isn’t working with the new tip, please let us know and we can get you a replacement.
Other Issues
If the issue isn’t with the transformer or the battery, then you may want to send it in so we can take a look at it. The fusible link might have been fried, or any number of other random things. You can find the 7700 rebuild program here. We’ll replace any parts that aren’t working and test the iron and charger.
Hopefully this guide has helped you with troubleshooting a Cordless soldering Iron. Have any tips for how to prolong the life of your iron? Be sure to contact us.

1. my iso-tip120 iron has no butane comming out when turn on.
2. if it is clogged how do I clean or clear out
3. if you have direction how to take apart can you email me them
Check the small brass orifice assembly and the nozzle assembly. Sometimes you’ll even see a paste like substance clogging one or both of those. At this point we recommend replacing those parts – though we are working on repair/cleaning options.
My Iso tip 7700 had no heat at all on the new tip I installed however the light was bright, I replaced the nicad cells and still the same ..I have the correct voltage at the charger..
What is the likelihood of my last new tip being faulty? How can I test this without another tip?
My iso-tip 7700 doesn’t heat up. I have done the USB conversion, as I am in Europe, and the 110 transformer doesn’t work. The voltage reaches 2.3 v in the iron, but when I press the button, the light briefly turns on, and dims rapidly. Without the tip inserted it lights up just fine. Is the problem the battery? At what voltage does the iron not work?