
To create stained glass art, soldering will be a fundamental skill to bring your designs to life. If you’re passionate about crafting stained glass and want to master the art of soldering, this comprehensive guide will take you through the essential steps to create stunning and enduring works of art.
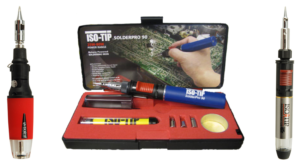 1. Gather Your Materials and Tools To start your stained glass soldering journey, ensure you have the necessary tools and materials. This includes a soldering iron, solder, flux, copper foil, glass cutter, glass pieces, safety goggles, and a well-ventilated workspace. Quality tools can make a significant difference in the final result. To view our quality butane soldering irons, click here!
2. Prepare Your Glass Pieces Create or select your stained glass design and cut the glass pieces accordingly. Use a glass cutter to achieve precise shapes. Smooth the edges with a glass grinder to ensure a snug fit and reduce the risk of cuts during handling.
3. Apply Copper Foil Wrap each piece of glass with copper foil, which acts as a pathway for the solder to adhere. Carefully align the foil along the edges of the glass pieces, ensuring it adheres securely.
4. Apply Flux Using a brush, apply a thin layer of flux over the copper foil. Flux cleans the metal surface and facilitates the soldering process by promoting better adhesion.
5. Heat the Soldering Iron Plug in your soldering iron and allow it to heat up. While it’s heating, put on safety goggles to protect your eyes from potential splatters of molten solder.
6. Solder the Joints Gently press the heated soldering iron against the copper foil seams. As the soldering iron heats the solder, it will flow and create a strong bond between the glass pieces. Ensure the solder covers the entire seam and forms a smooth, even line.
7. Create Lead Lines (Optional) For a traditional stained glass look, you can mimic the appearance of lead came by adding solder lines between the glass pieces. Use the soldering iron to carefully build up these lines, enhancing the visual appeal of your piece.
8. Allow to Cool and Inspect Once you’ve soldered the joints and any lead lines, allow the piece to cool naturally. Inspect your work for any gaps, uneven soldering, or areas that may need touch-ups.
9. Clean and Polish After the solder has cooled, clean your stained glass piece with a soft cloth to remove any excess flux or residue. A glass cleaner can help polish the glass and solder to a beautiful shine.
10. Display and Admire Once your stained glass piece is cleaned and polished, find the perfect spot to display your artwork. Whether it’s a window, a frame, or a stand, let your creativity shine as you share your artistic achievement with the world.
By following these steps, you can master the art of soldering stained glass and create captivating pieces that showcase your creativity and craftsmanship. Remember that practice is key, and as you refine your skills, you’ll find joy in the process of turning glass and solder into beautiful works of art.
The process of soldering stained glass may take some practice to master, but the YouTuber in this application note walks you through it step by step in their video, “Stained Glass Soldering :: Tips & Tricks to Get You Through Every Step.” Take a look for yourself to see how beautiful the end result is! This video will be extremely helpful to any beginner, check it out down below!
You can follow this YouTuber on her channel, SunBearGlassCraft.
Trackbacks/Pingbacks